Free Embroidery: Everything You Need to Know
Free embroidery is a creative technique where you work without a fixed pattern and create your own designs using needle and thread. Unlike traditional embroidery, you do not follow a pre-printed pattern, but decide the shapes, lines, and colors yourself.
It is a relaxing hobby where you create something unique step by step — from small details to complete textile artworks.
What Do You Need for Free Embroidery?
To get started with free embroidery, you need a few basic supplies:
- • Embroidery hoop – keeps the fabric taut while working
- • Embroidery needles – with a larger eye for embroidery thread
- • Embroidery floss (e.g. cotton/mouliné) – available in many colors
- • Fabric – such as cotton, linen, or canvas
- • Scissors – for neatly trimming threads
- • Pencil or washable marker – to lightly sketch your design
Want to get started right away? Then choose a DIY embroidery kit, which already includes everything you need.
How Do You Start Free Embroidery?
1. Choose or create your design. You can draw your own design or use inspiration (e.g. flowers, shapes, or text).
2. Draw your design onto the fabric. Use a light pencil line or a washable fabric marker. For example, a Trickmarker (disappears under UV light) or a water-soluble pen.
3. Place the fabric in the embroidery hoop. Make sure the fabric is tight, but not stretched out.
4. Choose your stitches and colors. Start simple with basic stitches such as straight stitch, backstitch, or chain stitch.
5. Start embroidering. Work calmly and build your design layer by layer.
6. Finishing. Secure your thread neatly at the back and trim away any excess threads.
Basic Embroidery Stitches
As a beginner, you can start with a few simple stitches:
- • Straight stitch – for lines and details
- • Backstitch – for clean outlines
- • Chain stitch – for playful lines
- • French knot – for small accents and texture
- • Satin stitch – for filling in shapes
Basic Embroidery Stitches Explained
To get started with free embroidery, you do not need complicated techniques. With just a few basic stitches, you can already create surprisingly beautiful designs.
Straight Stitch
The straight stitch is the simplest stitch. You push the needle straight through the fabric and back up again. Ideal for lines, small details, and minimalist designs.
Backstitch
The backstitch is made by stitching slightly backwards each time. This creates a clean, continuous line. Perfect for outlines and text.
Chain Stitch
With the chain stitch, you create loops that resemble a chain. Beautiful for playful lines and decorative patterns.
French Knot
The French knot is a small raised knot in the fabric. Ideal for accents, flower centers, and adding texture.
Satin Stitch
With the satin stitch, you completely fill a shape with thread. Perfect for leaves, solid areas, and letters.
Tip: Start with the straight stitch and backstitch. Once you master these, you can easily expand with more decorative stitches.
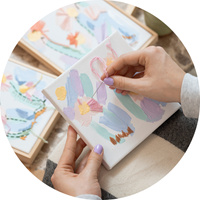
Sarah from iHobby: What I really love about embroidery is using thick yarn to embroider a sweater with a name on it. I use the chain stitch for this. I also really enjoy embroidering on denim, such as jeans or a denim jacket. Even a simple canvas shopper bag can be transformed beautifully with simple embroidery. Embroider your favorite quote or a fun detail like a flower, butterfly, or bee. Oh, and do you know what is also really cool? Embroidering on paper. Create an original name card for a birth announcement with an embroidered name on it. Last but not least, did you know you can combine embroidery with other creative techniques? For example, with painting. First create a watercolor artwork and then embroider details into your watercolor drawing.
Tips & Tricks for Free Embroidery
- • Start with a simple design
- • Stretch your fabric tightly in the embroidery hoop
- • Do not use threads that are too long (prevents knots)
- • Work from the inside out for better overview
- • Combine different stitches for more depth
- • Practice first on a scrap piece of fabric
Common Mistakes
- • Pulling the thread too tightly (causing the fabric to pucker)
- • Using threads that are too long
- • Not using an embroidery hoop
- • Choosing a design that is too complicated as a beginner
Inspiration
Free embroidery is often used for:
Embroidery for Christmas
Embroidery with Kids
Create your own small artworks on canvas with letter beads. First draw with markers and then add details using embroidery thread, beads, and rhinestones. With letter beads, you can create short quotes or words that describe you.
FAQ – Free Embroidery
1. Is embroidery difficult to learn?
No, with a few basic stitches you can quickly create beautiful results.
2. Which fabric is best to start with?
Cotton or linen is ideal because it is sturdy and easy to work with.
3. Can I use Aida fabric for free embroidery?
Yes, you can, but Aida fabric is mainly intended for cross stitch embroidery. For free embroidery, smooth fabrics such as cotton or linen often look nicer and offer more creative freedom.
4. Do I need an embroidery hoop?
Yes, this keeps your fabric taut and helps you work more neatly.
5. What is the difference between free embroidery and embroidery with a pattern?
With free embroidery, you create your own design, while with a pattern you follow a fixed chart.
6. Can I embroider on clothing?
Yes, absolutely. Just make sure the fabric is suitable and not too stretchy. Suitable materials include:
- • Denim
- • Cotton (such as T-shirts or blouses)
- • Canvas or sturdy fabrics
Pay attention when working with stretchy fabrics:
Preferably choose clothing with a maximum of 5% elastane (lycra/stretch). The less stretch, the easier the embroidery process and the cleaner your final result will be.
Tip: For thin or slightly stretchy fabrics, you can use fusible interfacing (stabilizer) on the back for extra support.
7. How can I prevent my thread from tangling?
Use shorter pieces of thread and occasionally let your needle “hang” so the thread can untwist itself.
8. How do I neatly finish my embroidery?
Secure the thread at the back and trim it short for a clean result.
Let your creativity run free and discover how fun and relaxing free embroidery can be. Explore our materials and DIY kits and get started right away.
```